> For the complete documentation index, see [llms.txt](https://oiadocs.cloudfabrix.io/llms.txt). Markdown versions of documentation pages are available by appending `.md` to page URLs; this page is available as [Markdown](https://oiadocs.cloudfabrix.io/integrations-guide/integrations/netapp-7-mode.md).
# NetApp 7 Mode
## Prerequisites:
1. NetApp ONTAP Release Version 8.2.x
2. Hostname and read-only credentials for the Netapp storage device
## Addition of NetApp Mode 7 Datasource:
1. Login to cfxDimensions App with User credentials.
2. Under Datasources App, select ‘+’ icon on the top right corner to add new Datasource

3\. Select Datasource Type as ***NetApp ONTAP***
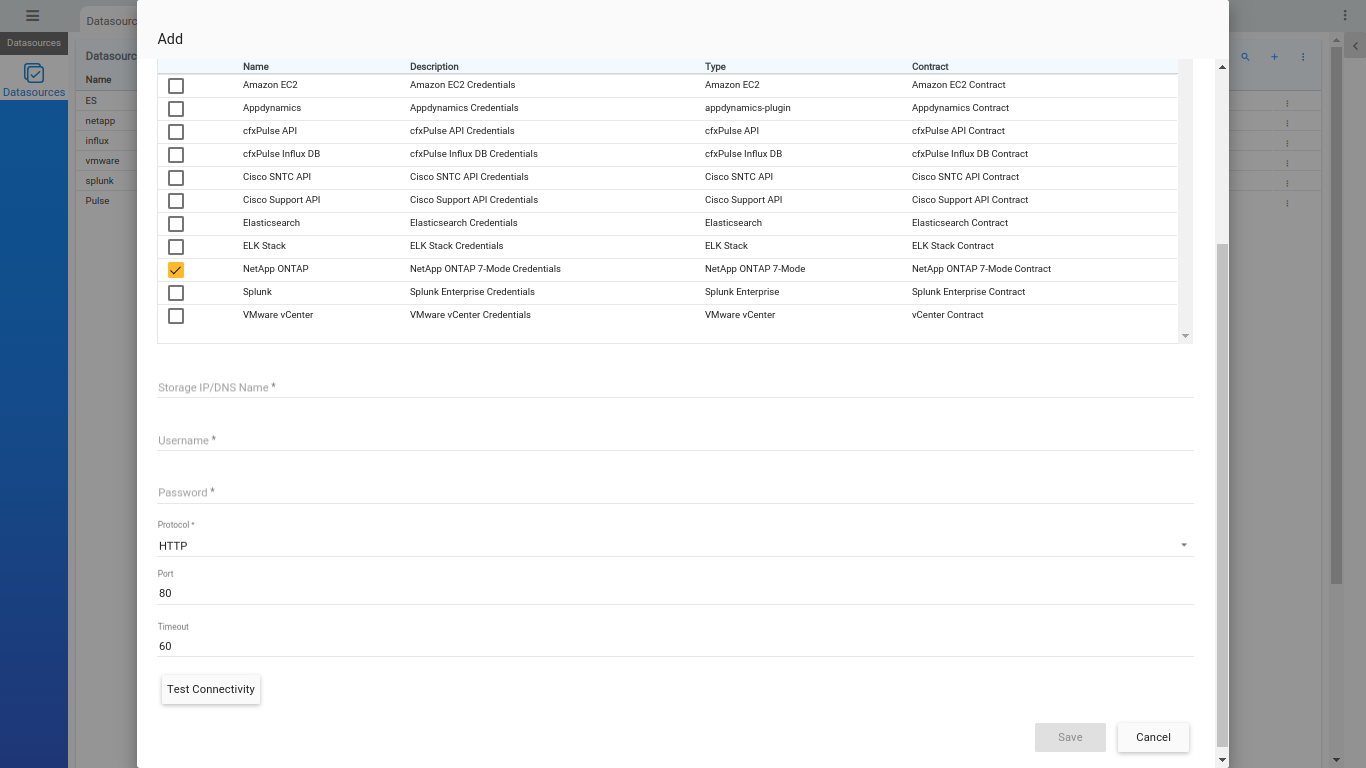
Enter the details
* **Storage IP**: Specify the IP address of NetApp Device
* **Username**: Specify the Username
* **Password**: Specify the password
* **Port**: Specify the Port (By default it is set to 80)
* **Timeout**: Specify a timeout required to wait for the response
**Note**: To run the resolver with gateway, set ***‘requires gateway access’*** as Yes and select the gateway that you have created.
## Adding NetApp Datasource in the incident room:
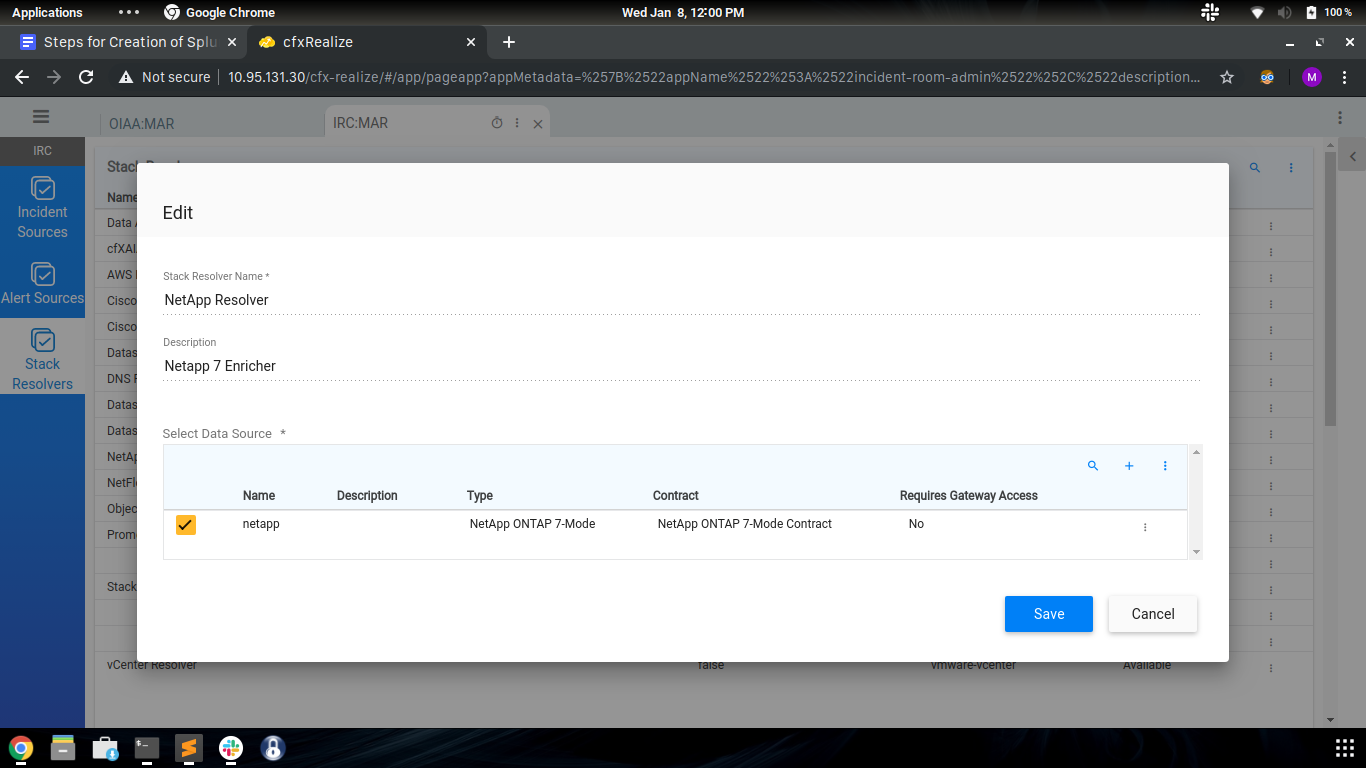
1. Log in to Realize App -> OIAA App
2. Inside the project, under stack resolvers, search for NetApp Resolver.
3. Edit and select the netapp Datasource
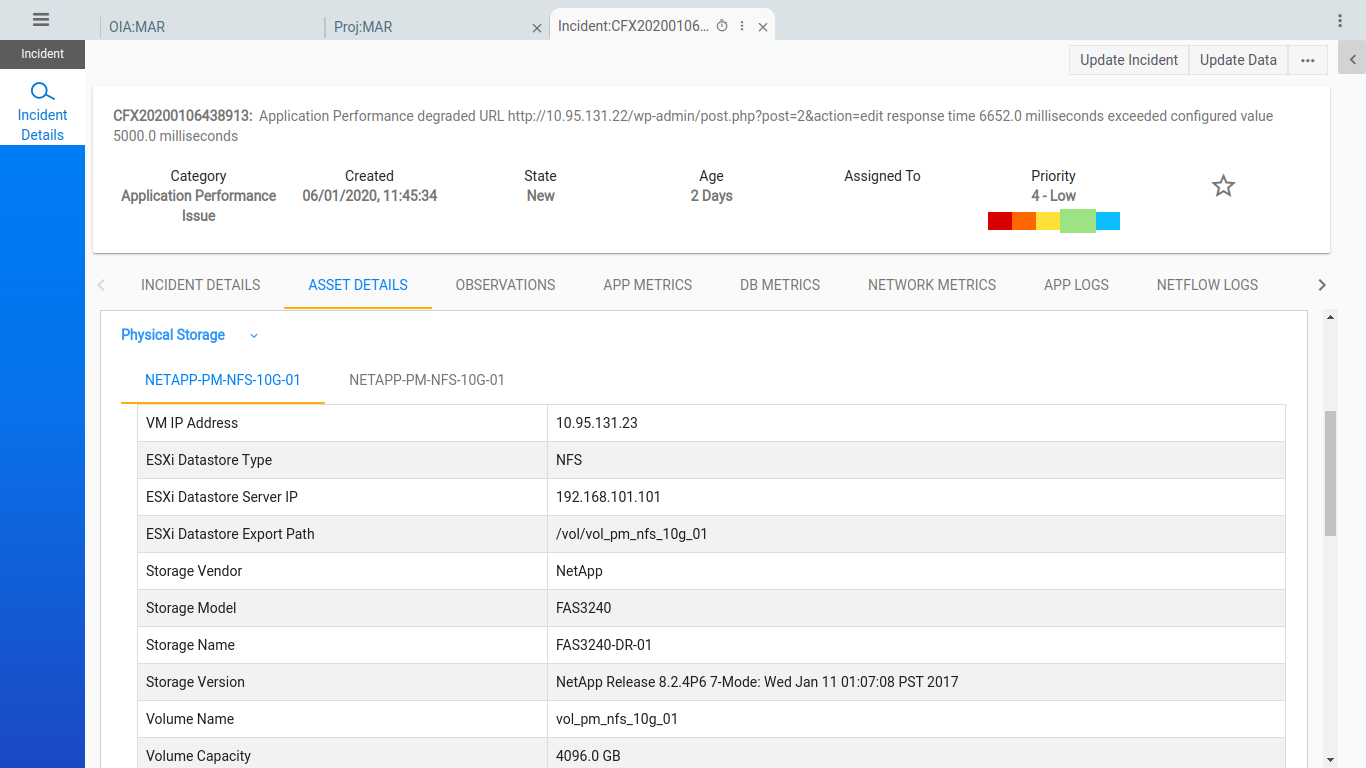
4\. Go to the OIA App and create an incident room.
5\. Create and incident with Application Performance issue.

6\. Click on the incident ticket
7\. The NetApp related information can be seen under Asset-details tab as Physical Storage.